DIY Environmental Sensors for ~$10
The Harware
The core of this build is a “NodeMCU”. Although “NodeMCU” actually refers to some firmware and software that allows you to run Lua on an ESP-12E, here “NodeMCU” is just the magic word we need to access the cheap Chinese hardware goodness. We’re using the “NodeMCU” since we can get them for $4.50 off Amazon or $3 from the usual suspects.
This is one of those cases where buying a complete board is cheaper than buying the components and assembling them yourself since just the ESP-12E and the LM1117 3.3v regulator would run you more the then whole “NodeMCU”, which includes both of those plus a CP2102 USB to UART chip and some really nice flash reset buttons which make programming these a breeze compared to the AI thinker ESP-01’s.
Anyways, the Espressif line of WiFi-enabled devices is a breeze to use with the Arduino IDE, which we’re going to use since it’s simple and it Just Works™.
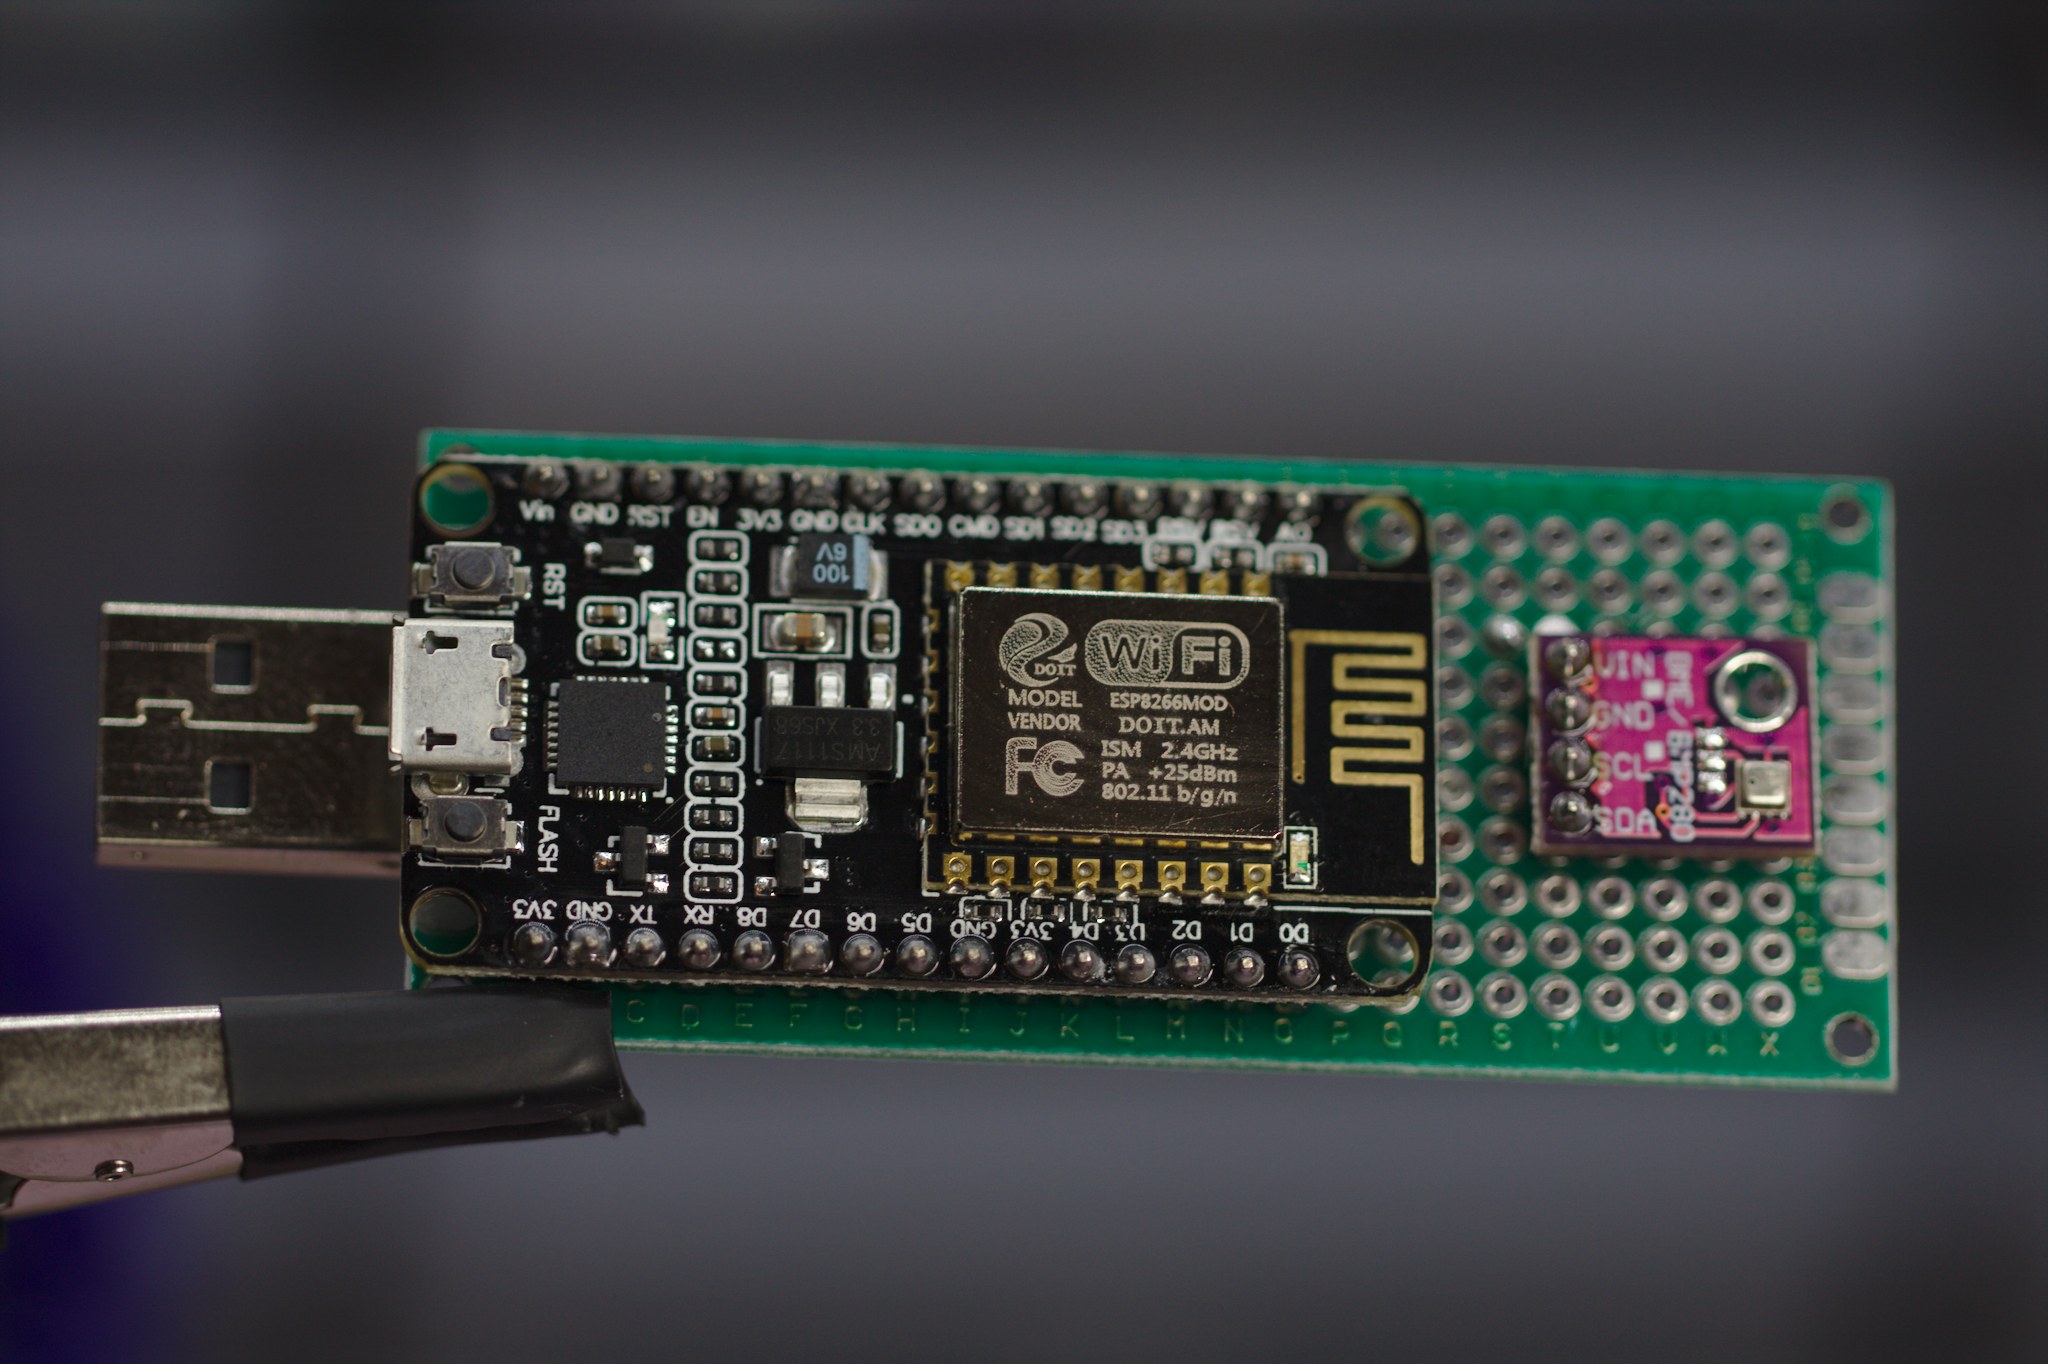
I’m using the Bosch BME280 combo temperature, pressure, and humidity sensor here over the more popular DHT-11/22 series sensors because these use I2C and they can take readings a lot faster and more reliably. Oh, and did I mention they measure atmospheric pressure?
So without further ado, here are the bill(s) of materials:
Amazon Only BOM
| Item | Units | Cost | Cost/Unit | Link |
|---|---|---|---|---|
| “NodeMCU” | 4 | $17.99 | $4.50 | amazon |
| BME280 Sensor | 4 | $16.99 | $4.25 | amazon |
| USB A Male Connector | 20 | $6.99 | $0.35 | amazon |
| 3cm x 7cm PCB Protoboard | 12 | $6.99 | $0.58 | amazon |
| Total | 4 | $48.96 | $12.24 |
Aliexpress BOM
| Item | Units | Cost | Cost/Unit | Link |
|---|---|---|---|---|
| “NodeMCU” | 4 | $12.00 | $3.00 | aliexpress |
| BME280 Sensor | 4 | $12.24 | $3.06 | aliexpress |
| USB A Male Connector | 10 | $0.69 | $0.07 | aliexpress |
| 3cm x 7cm PCB Protoboard | 10 | $4.29 | $0.43 | aliexpress |
| Total | 4 | $29.22 | $7.30 |
Assembly
My goals for this design were twofold: keep it simple and keep it cheap. The protoboard makes it easy to mount the USB A connector to and gives you plenty of space to potentially add on more sensors later on. Additionally, having that large USB connector means you can plug the whole contraption straight into one of those USB wall outlets that I’m sure all of us electronics enthusiasts have dozens of at this point.
Here are the general assembly steps I’ve followed:
- Bend the little tabs out on the USB A male connectors and solder them to the protoboard.
- Solder the “NodeMCU” to the protoboard (You could also use some 0.1” female headers if you wanted to have the option of removing the “NodeMCU” later on)
- Connect the 5V and GND pins of the USB connector to their respective pins on the “NodeMCU”
- Solder the BME280 breakout board to the protoboard
- Connect the 3.3V, GND, D1, & D2 pins to the breakout board
Here how your wiring should look:
| “NodeMCU” Pin | Breakout Board Pin | Explanation |
|---|---|---|
| 3V3 | VIN | 3.3V power rail |
| GND | GND | ground rail |
| D1 | SCL | serial clock line |
| D2 | SDA | serial data line |
And here’s some unflattering photos of my soldering work:
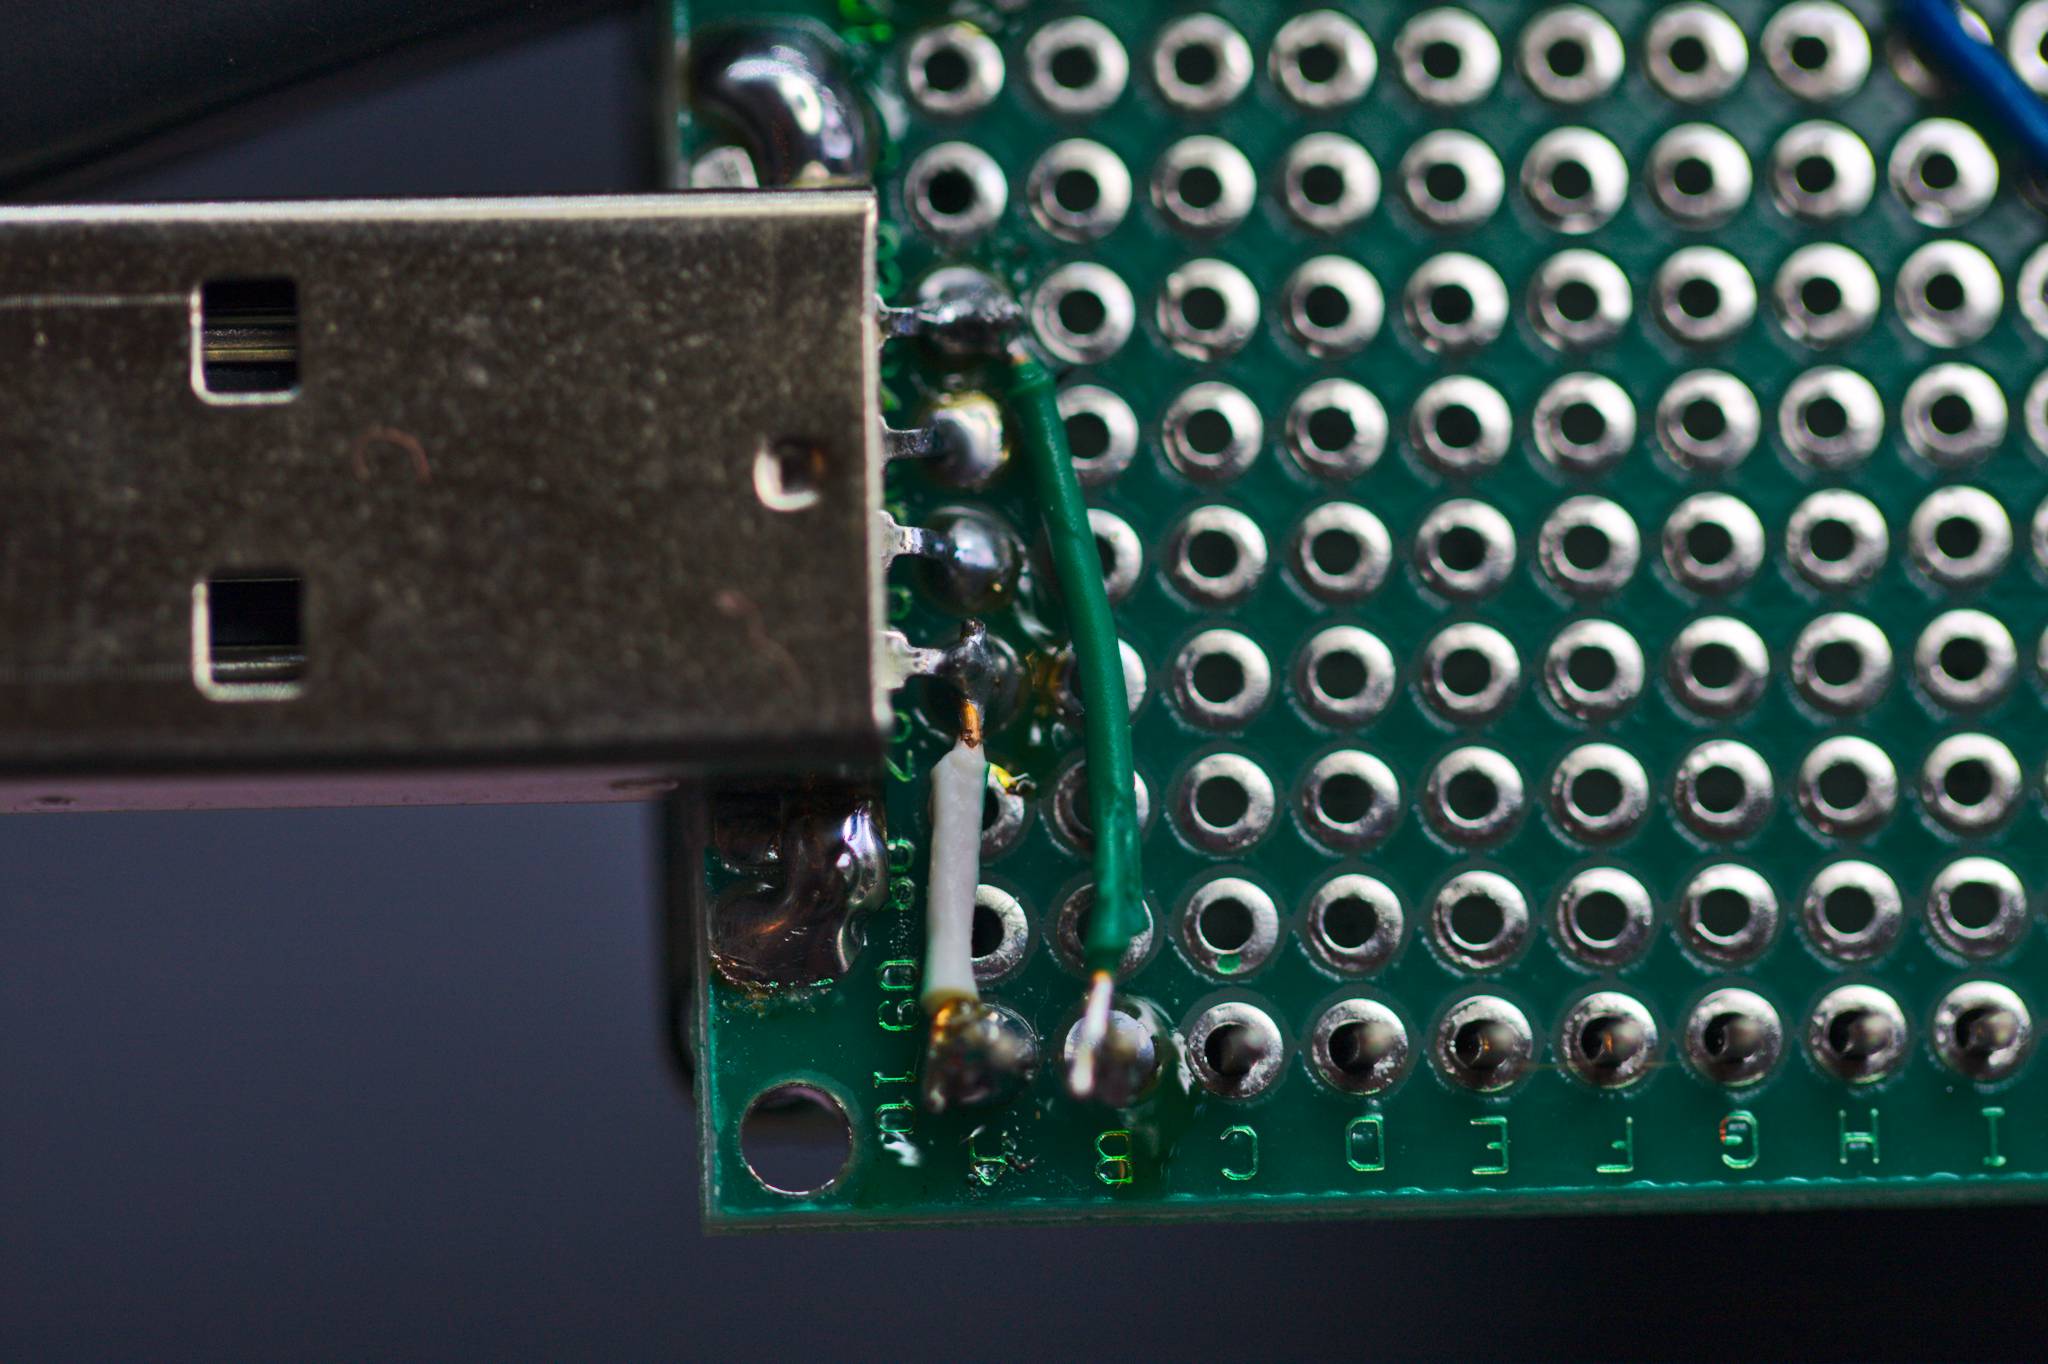
The 5V and GND connections from the USB connector to the NodeMCU
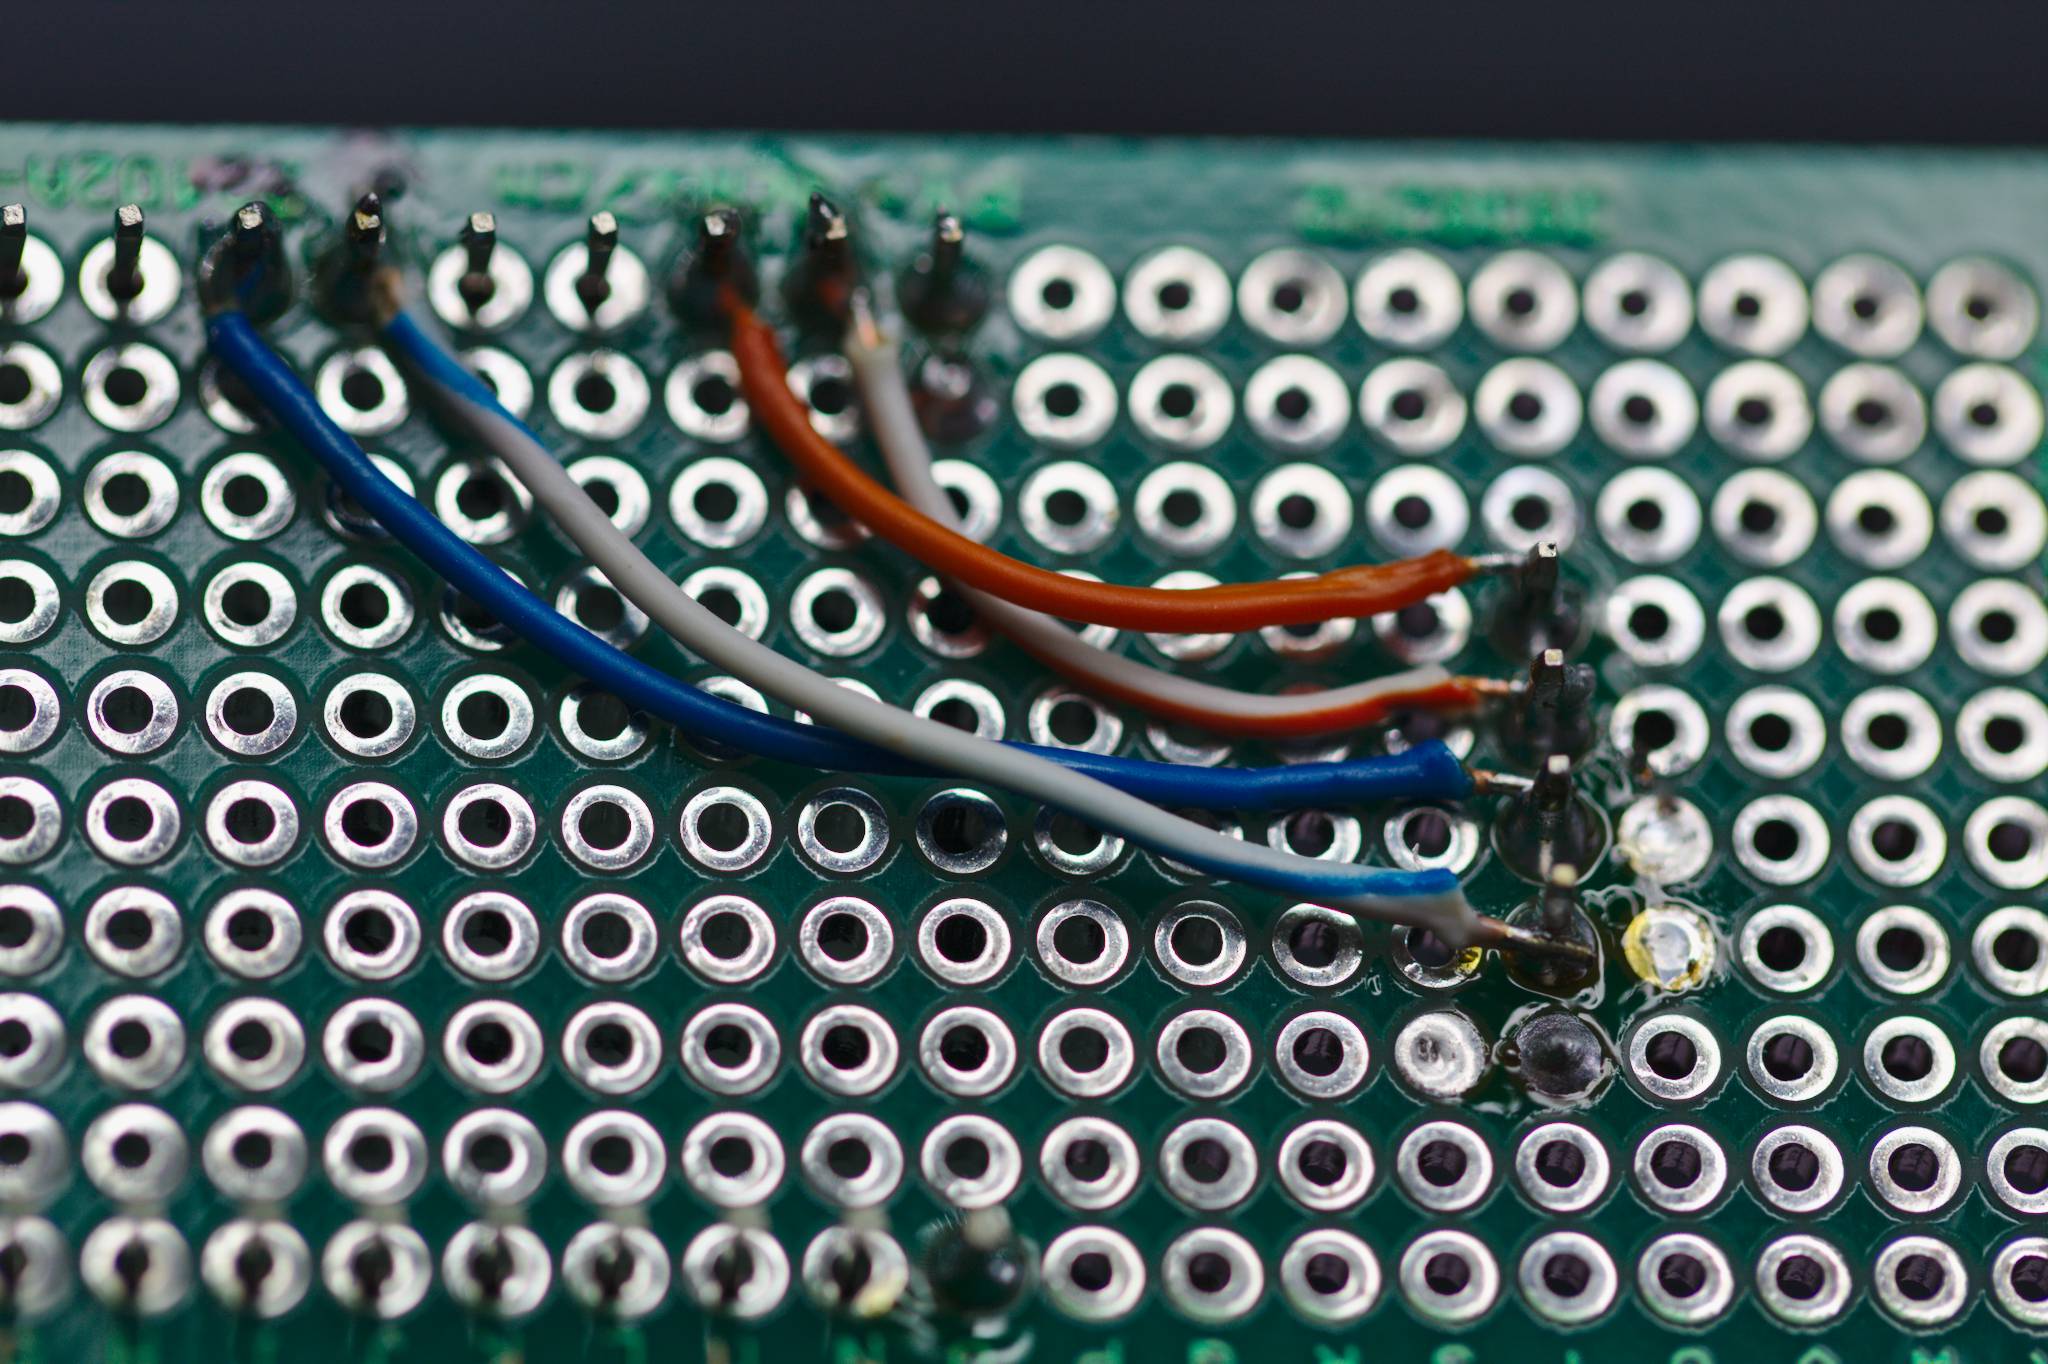
The 3.3V, GND, SCL, & SDA connections to the breakout board
The Software
The following code uses the Sparkfun esp8266 board files and the Adafruit BME280 library.
To install the Sparkfun esp8266 board files, head over to their GitHub linked
above and follow the steps there. For the Adafruit library, go to Tools ->
Manage Libraries and search for “adafruit bme280”, then click Install.
The Code
Here’s the quickest, dirtyiest code I could put together that makes everything work:
#include <ESP8266WiFi.h>
#include <WiFiClient.h>
#include <ESP8266WebServer.h>
#include <Wire.h>
#include <SPI.h>
#include <Adafruit_Sensor.h>
#include <Adafruit_BME280.h>

const char* ssid = "The name of your WiFi network";
const char* password = "The password for your WiFi";

ESP8266WebServer server(80);
Adafruit_BME280 bme;

const int led = D0;

void handleRoot() {
  digitalWrite(led, 1);
  server.send(200, "text/plain", "hello from esp8266!");
  digitalWrite(led, 0);
}

void handleTemperature() {
  server.send(200, "text/plain",
  String((bme.readTemperature() * (9.0/5.0)) + 32.0));
}

void handleHumidity() {
  server.send(200, "text/plain", String(bme.readHumidity()));
}

void handlePressure() {
  server.send(200, "text/plain", String(bme.readPressure() / 100.0F));
}

void setup(void) {
  pinMode(led, OUTPUT);
  digitalWrite(led, 0);
  WiFi.mode(WIFI_STA);
  WiFi.begin(ssid, password);

  // Wait for connection
  while (WiFi.status() != WL_CONNECTED) {
    delay(500);
  }
  unsigned status = bme.begin(0x76);

  server.on("/", handleRoot);
  server.on("/temperature", handleTemperature);
  server.on("/humidity", handleHumidity);
  server.on("/pressure", handlePressure);

  server.begin();
}

void loop(void) {
  server.handleClient();
}
Please note that this code has a couple of fairly obvious flaws. First, what happens if we lose connection to the WiFi network? This code never attempts to reconnect, so you would have to reset the microcontroller to get it to re-associate. Second, I’ve removed all the debug output over the serial console, so it’s going to be hard to tell if everything is working until you hit the HTTP endpoint.
These changes shouldn’t be that hard to make and I’ll probably end up writing it out and throwing it up on GitHub. If I do that, I’ll edit this post to include a link.
Cool Things to Build & Closing Thoughts
I use sensors like this to create dashboard for my homelab and other things. If you’re interested, I use collectd to ingest data and InfluxDB to store it. Then I use Grafana to display the data in a series of dashboards.

Some of the graphs I've built using the sensor data in Grafana
This post was written a few weeks after I actually assembled and programmed the boards. Feel free to send me a message if I’ve missed anything important.
Also, none of the Amazon or Aliexpress links are affialiates if you care about that sort of thing.